Thursday, June 30, 2011

Fastest DIY Playset Yet!


I was having a moment the other day, where there was something I had to sew up, but Daniel was having none of it, so I whipped up this simple toy to keep him busy for a few minutes.


All you need are a few simple supplies:
 -Tin Craft Mailbox (I found ours at Walmart but you can find them at craft stores or by snooping around the net)
-Stamps and ink of any kind
-Little envelopes, blank business cards, index cards, card stock, stiff felt or whatever you have on hand
-Stickers or embellishments and crayons


Just stamp away, pass the cards to your little one and let them decorate!

Monday, June 20, 2011

Top 50 Mom Craft Bloggers

I'm on the list! You can vote for me here. And what a great place to check out some more craft blogs!


And for your entertainment: Me chowing down on Mini-Donuts in Florida. How I miss that weather!

Tuesday, June 14, 2011

Sewn Climbing Bear Toy Tutorial


I am endlessly impressed by Made by Joel. He makes such beautiful, simple, wonderful things! I recently came across his Climbing Gorilla tutorial and found myself wishing (again) that I knew how to woodwork. I looked around for a tutorial for someone who doesn't have tools at home and I couldn't find much. And is I was looking, someone else might be too. Here's what I came up with:


Supplies:
Wool Felt (I used an old, felted sweater scrap)
Beans
Yarn or String (aprox 3 feet)
2 Medium Sized wooden beads
Pattern

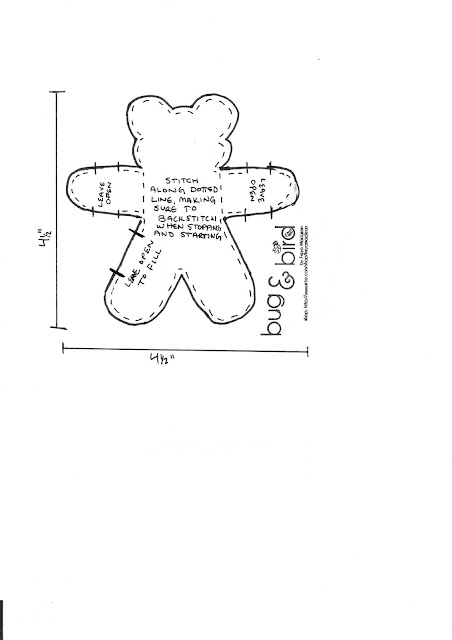
1.) Print the pattern at the bottom of this post (should be 4.5"x4.5", or desired size) and cut it out.

2.) Cut 2 bears out of felt.

3.) Pin and sew along dotted lines. Leave gaps right through the middle of the arms for the string. Make sure to backstitch when stopping and starting. Notice that the bear has dotted lines from shoulder to armpit? Sew there! That's so beans don't wiggle out of his middle and through the string holes. Be sure to leave a gap to stuff him!

4.) Fill the bear with dried beans or dried peas. Don't pack them in too tight. If he's too heavy it will put unnecessary stress on your seams...and who wants to re-sew anything?

5.) Sew opening shut.

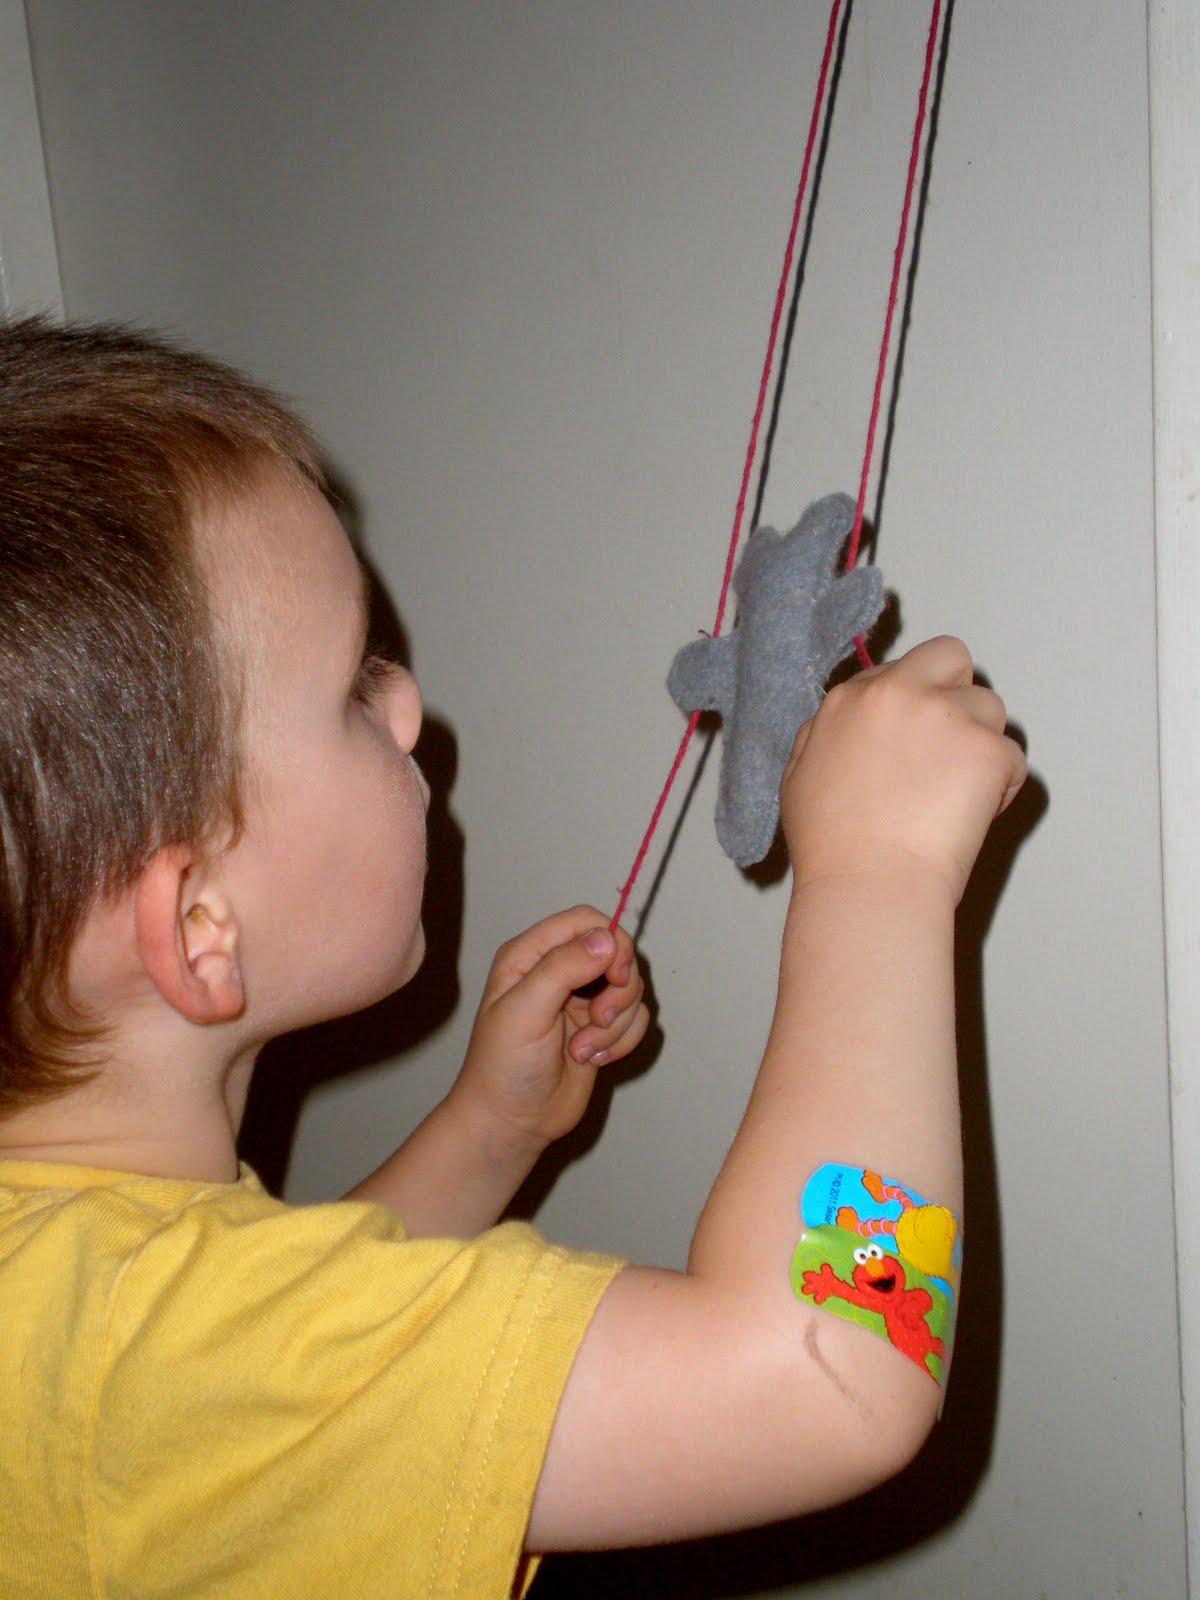
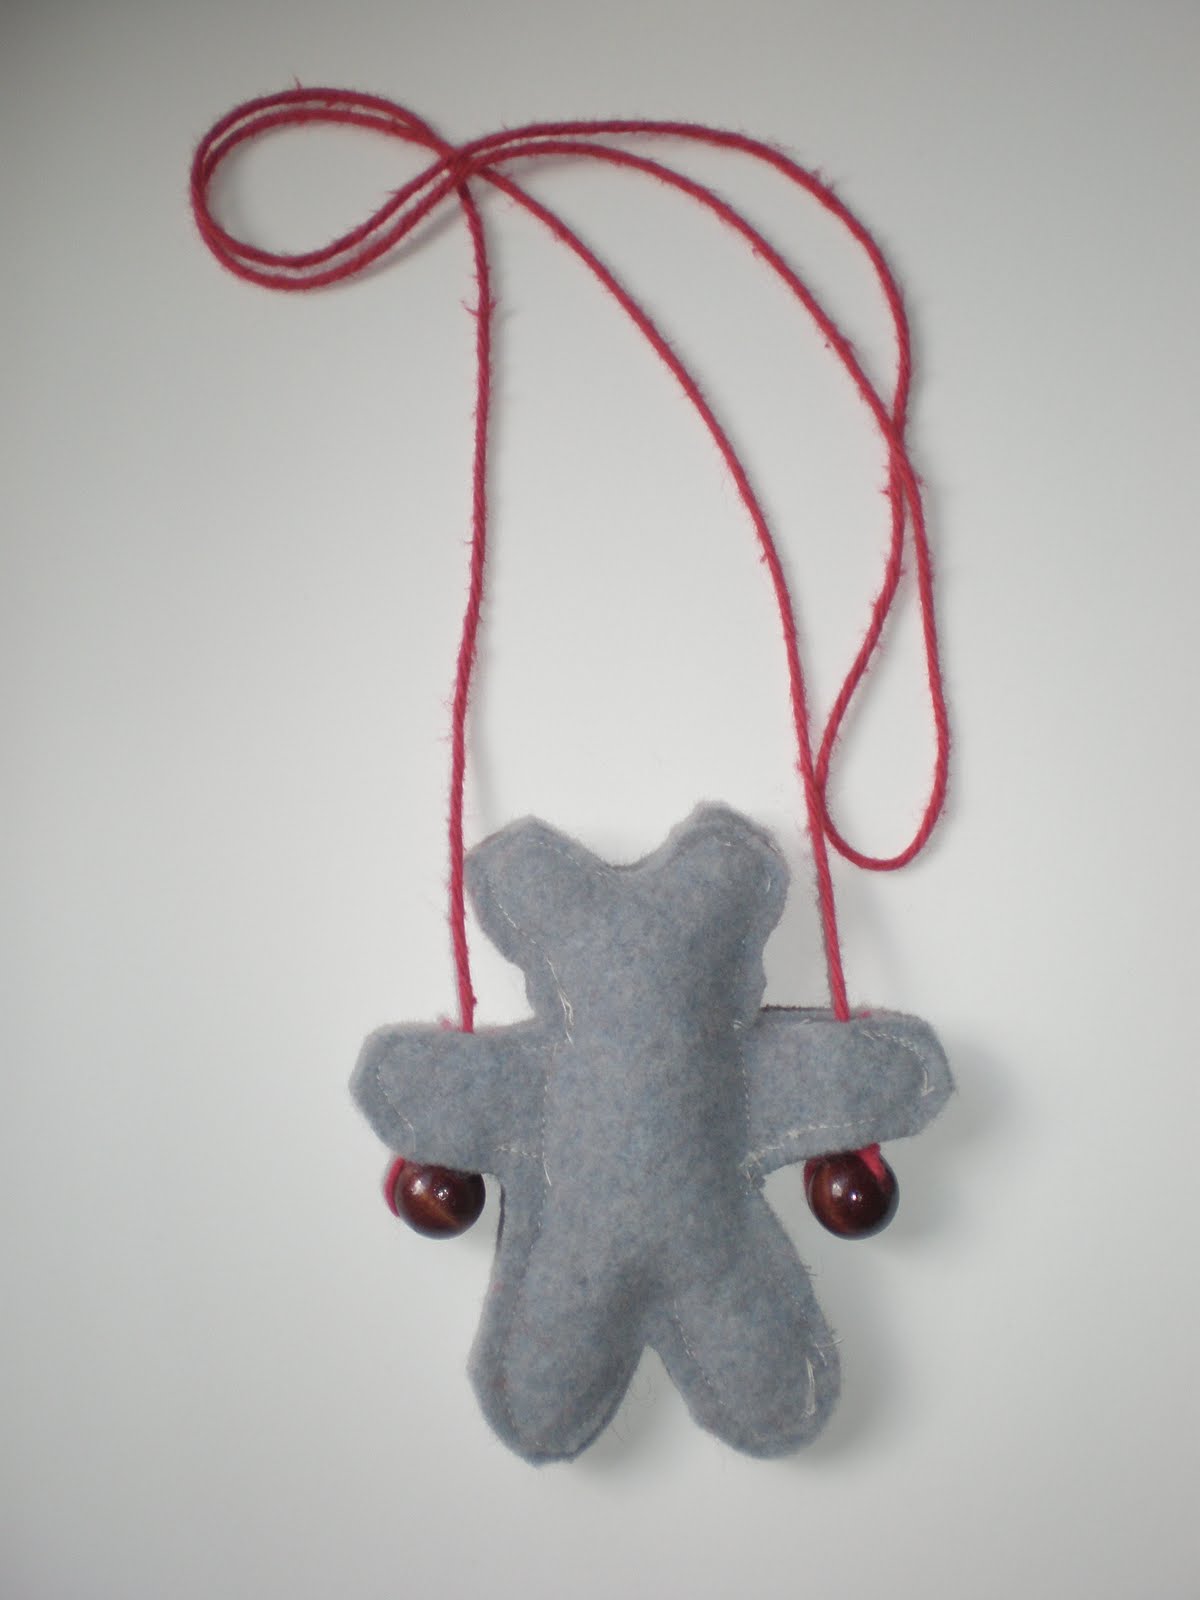
6.) Feed string through the holes, top to bottom. Tape the ends with scotch tape to make it easier! Tie beads at the ends of the string.

7.) Done! Now you hang it on a door know and practice wiggling the strings back and forth to make the bear shimmy up and down!
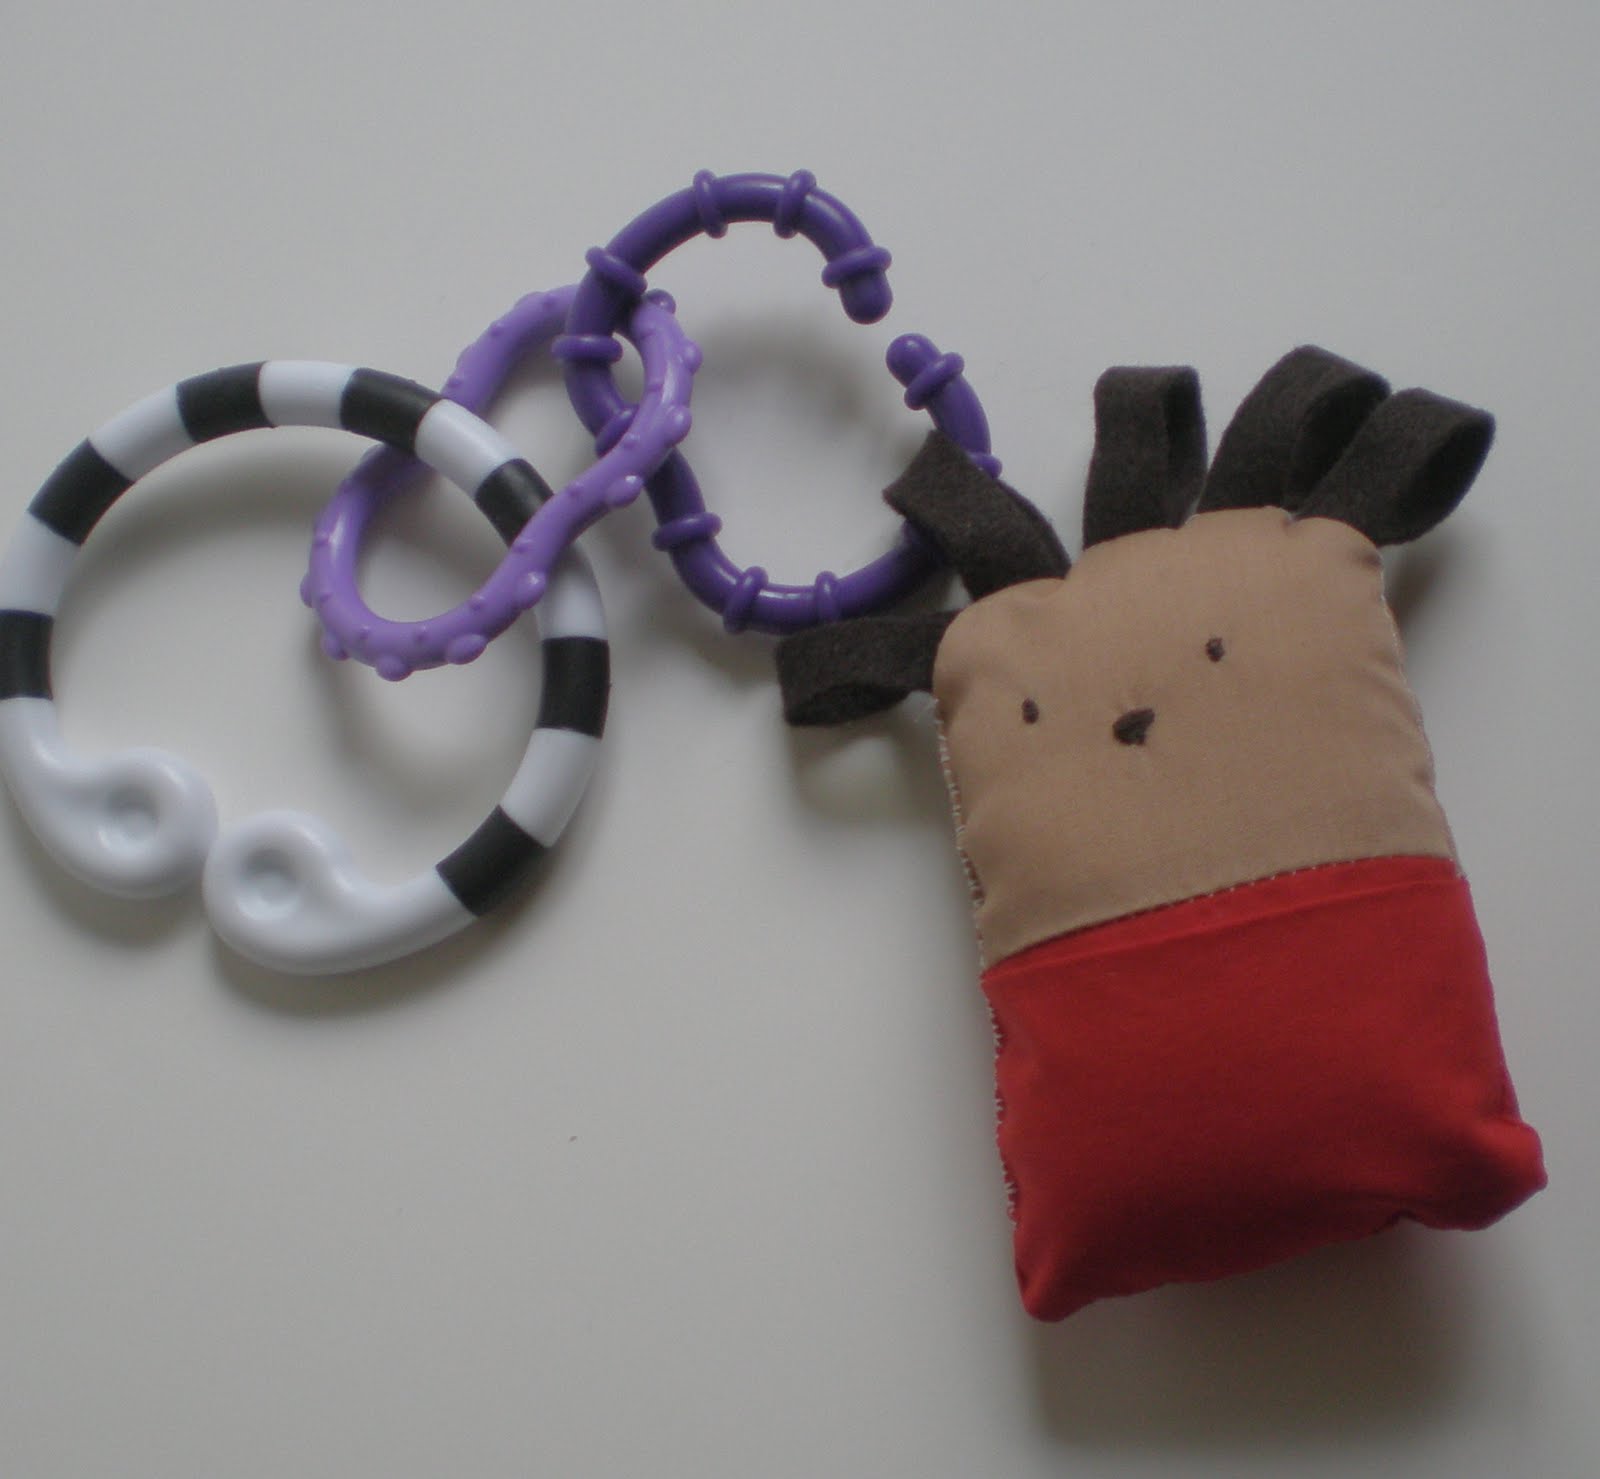
And here is a no-sew, no-tool version.

Monday, June 13, 2011

Hegehog Themed Baby Shower Gift

I've outdone myself! My first baby gift basket was cute, but this one is to die for!


It all started with finding this adorable wooden hedgehog clock at Superstore. I knew it would look perfect in my goddaughter's room, although I was tempted to keep it for myself!

I found this great hedgehog softie tutorial and whipped one up right away in Michael Miller's Hegehog's color scheme.


I added a Bagsket to hold it all, and although the colors won't match baby's room, it will be a great tote for car toys.


Next month, I plan on hosting a second shower for a different crowd and I have a few things up my sleeve for my little peanut. Can't wait to show you!

Friday, June 10, 2011

Perfect Little Hedgehog Softie

Look what I made!


Cute...right? I made it for a baby gift, but what I really love about this pattern is that it's perfect for anyone. It could be made smaller and used as a key chain for a teen or it can be a money or chapstick holder for a tween or school-ager. It's a great baby toy or make a few and voila! A family of Hedgehogs for a preschooler.  It would even be a great gift card holder and it's gender-neutral. I'm in love.


 The only things I changed were that I embroidered the nose rather than attaching felt (seemed safer since it's for a baby), I made the felt spikes into loops so I can attach baby links and I did a quirky little contrasting whip stitch as a finish rather than an invisible ladder stitch because I thought it suited my little guy.

Can't wait to show you the whole gift!

Wednesday, June 8, 2011

Homemade Honey Toffee Un-Recipe

I was trying to come up with something, other than gum, for my little guy to chew on the plane. Enter my clever Mother-in-Law! She mentioned the she always made "Grampa's Toffee" for airplane trips when her kids were little. Genius! I prefer for Daniel to have honey or maple as sweeteners-especially when I know he's going to down 8 or 9 per flight so I decided to make my own recipe.


I thought of all the honey treats my mom made for me when I was little. I had the mom who shopped at the health food store, bought organic and started every morning with a vitamin buffet, before it was cool. I remember her making honey lollipops for me and I figured I could make toffee out of honey as well. I'm sure this will turn out differently at different altitudes etc, but if it's too soft, cook it to the hard crack stage (300 degrees) and add a little more butter. You can also store it in the fridge to keep it from melting.

So here is my delicious, honey toffee "un-recipe":

Ingredients:
About 4 Tbsp butter
About 3/4 cup creamed honey (liquid works, but they're a bit melty-er)
Sprinkle of Salt
Dash of Vanilla

Melt butter and honey in the pan on medium heat to the soft crack stage (or about 290 degrees).


Remove from heat and stir in vanilla and salt.


Pour into a well greased glass or ceramic dish and place in the fridge to cool for at least 4 hours, but preferably overnight.


Remove cold toffee from the pan, cut into pieces and wrap in wax paper squares.


 It's really that simple, and SO yummy. Honey is known for it's energy boosting and healing properties and as helpful for your immune system, so eat up!

Tuesday, June 7, 2011

Travel Toys and Activities

#1- Crafts

I just realized that I still haven't posted photos of all the bits and pieces we took on our trip with us! Some were mainly for the plane, and some mainly for the hotel.

#2- Squinkies
#3- Activities

A couple of tips: save some "new" things for the way back, bring comfortable headphones for airplane television or iPod's and consider wrapping everything up in wrapping paper for little ones-it can keep them pretty busy!

#4- Thinking
#5- Busy Toys

#1- Crafts: Blackboard and Chalk (in a chalk holder) with eraser, crayons, notebook and stickers galore!
#2- Squinkies: I love these because they're tiny and lots of fun. We put them in a small tin from Michael's to keep them together.
#3- Activities: Jacob's Ladder, Button Snake and a lunch tin filled with puzzle erasers in a home theme.
#4- Thinking: Usborne's 'Things to do on a Journey', key chain measuring tape and tiny package of Megablocks (they were very popular in the hotel!)
 #5- Busy Toys: Wiki Sticks (Daniel's favorite of the trip), Silly bands (second favorite!), play doh (great for the hotel) and a locking diary. I thought the diary would be a huge hit, but the lock was too cheap and didn't work at all. Next time I'd buy a separate lock and key for entertainment.
#6- Things That Go: The roll up mat was pretty good on the airplane's tray table, but we used both of the car toys much more at the hotel. I really liked the little Tonka ramp because it was small and easy to pack, but lots of fun at the hotel.

You Might Also Like:

Related Posts Plugin for WordPress, Blogger...